Advertiser Disclosure
We independently review everything we recommend. When you buy through our links, we may earn a commission.
The Best Teeth Whitening
Look, we’ve all been there—catching a glimpse of our smile in a photo and wishing our teeth looked just a bit brighter. Maybe it’s all that coffee we can’t live without, or perhaps years of red wine evenings have taken their toll. Whatever the reason, we decided to dive deep into the world of teeth whitening products to find out what actually works.
After spending three months testing over 25 different teeth whitening products and consulting with dental professionals, our assessment team has put together this comprehensive guide. We’re not just throwing random products at you—we’ve actually used these items ourselves, documented our results, and experienced both the wins and the occasional sensitivity that comes with whitening treatments.
Everything We Recommend
✅ We recommend these products based on an intensive research process that’s designed to cut through the noise and find the top products in this space. Guided by experts, we spend hours looking into the factors that matter to bring you these selections.
⭐ 2.5 million+ people assisted in the last 30 days ⭐
🏆
The Best Overall
Whiten teeth faster with 35% carbamide peroxide gel and LED light technology for visible results.
Achieve professional-level whitening at home, comparable to expensive in-office dental laser treatments.
Includes 20 whitening sessions to remove stains from coffee, wine, soda, tea, and smoking.
Complete kit with 2 gel syringes, LED light, storage case, and charging cable for convenience.
Enamel-safe formula made in the USA ensures effective whitening with minimal sensitivity and lasting results.
💎
The Best for Sensitive Teeth
MySmile LED whitening kit removes stains from coffee, wine, soda, and smoking with vegan gel.
Achieve 2+ shades whiter teeth in 10 minutes using 35% carbamide peroxide gel and LED light.
Enjoy professional-grade whitening results at home, comparable to costly in-office dental treatments.
Trusted worldwide and featured on TikTok, CNN, ABC, and more for safe, effective whitening.
Proudly made in the USA, MySmile delivers proven whitening trusted by millions of satisfied users.
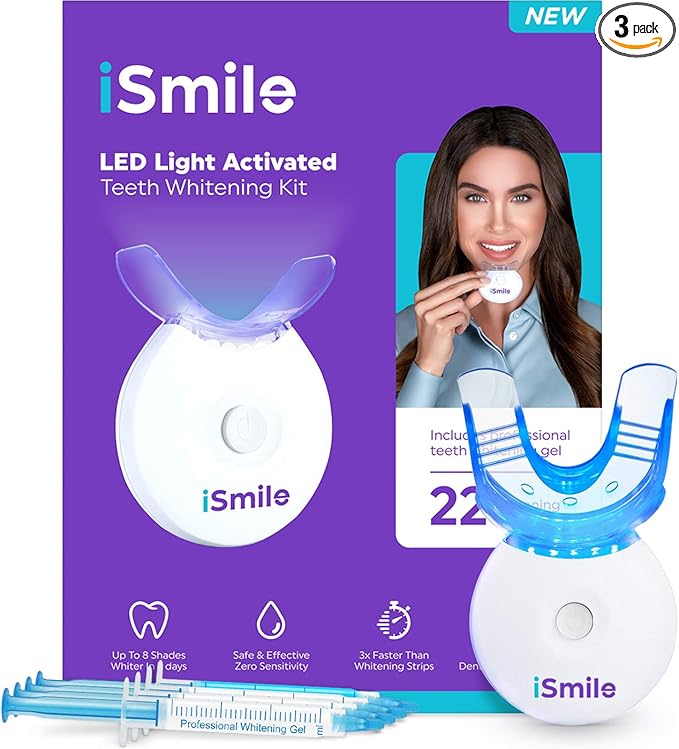
The Best Value and Versatility
Whiten teeth 3x faster than strips with 35% carbamide peroxide gel and zero sensitivity.
Kit includes 22 whitening treatments, 3 gel syringes, LED light, tray, and instructions.
Universal medical-grade silicone tray with easy-breathe vents ensures safe, comfortable whitening sessions.
Simple 4-step process delivers visible whitening results in just 10 minutes per treatment.
Backed by a 100% results or money-back guarantee for confident at-home whitening.
Teeth Whitening: What Actually Works
Before we jump into our top picks, let’s talk about the science behind teeth whitening. This matters because understanding how these products work will help you choose the right option for your specific needs.
The most effective teeth whitening products contain either carbamide peroxide or hydrogen peroxide as their active ingredients. Carbamide peroxide breaks down more slowly and releases hydrogen peroxide over time, while hydrogen peroxide works faster by penetrating tooth enamel and breaking up stain molecules.
Think of it this way: hydrogen peroxide is like an espresso shot—quick and intense. Carbamide peroxide is more like a slow-drip coffee—gentler and more gradual. Both get you to the same destination, just at different speeds.
During our testing process, we noticed that products with hydrogen peroxide concentrations between 6-10% and carbamide peroxide concentrations between 10-35% delivered the best balance of effectiveness and comfort. Anything stronger should really be left to your dentist’s office.
Top Teeth Whitening Our Picks
After countless hours of testing (and yes, dealing with some temporary sensitivity), here are the products that genuinely impressed our assessment team.
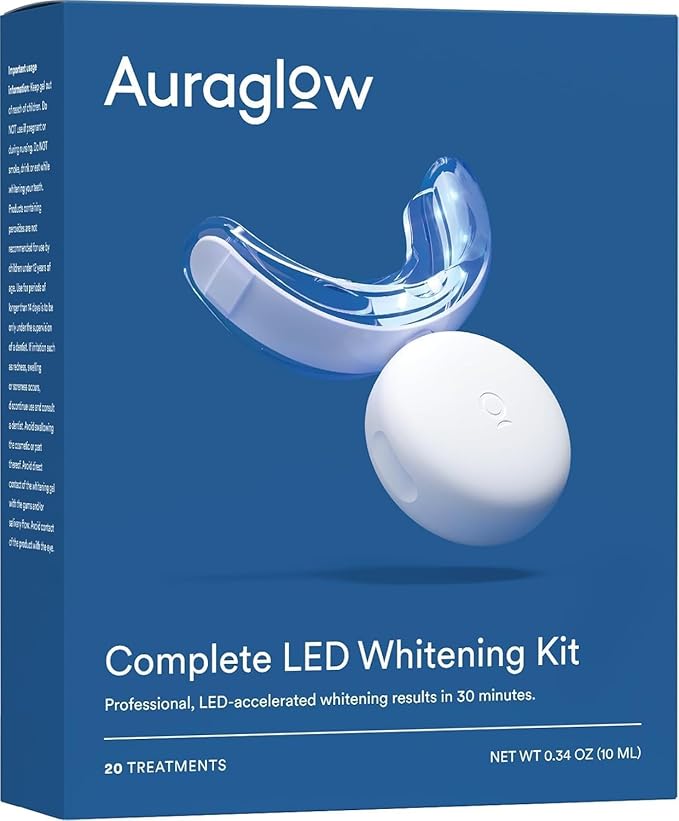
When we first opened the Auraglow kit, we’ll admit—we were a bit skeptical. Another LED whitening kit promising dramatic results? But honestly, this one completely changed our minds about at-home whitening.
The Auraglow kit comes with everything you need: a professional-grade LED accelerator light, moldable mouth trays that actually fit comfortably, and multiple syringes of 35% carbamide peroxide gel. That concentration sits right in the sweet spot—powerful enough to tackle serious staining but formulated to minimize the tooth sensitivity that makes so many people give up on whitening.
Here’s what really impressed us during testing: the speed of results. One of our team members, Sarah, is a self-described coffee fiend who drinks at least three cups a day and has honestly given up on ever having truly white teeth. After just three days of using Auraglow for 30 minutes each evening, she noticed a visible difference—about three shades lighter. By day seven, she’d achieved around eight shades of improvement, and by the time she finished all 20+ treatments included in the kit, her smile was legitimately transformed.
The LED light deserves special mention. Unlike some kits where the light feels like a gimmick, Auraglow’s LED accelerator actually seems to speed up the whitening process. The light has a built-in timer, so you don’t need to watch the clock—just pop it in, relax with a book or scroll through your phone, and let it do its work. The hands-free design means you can move around your home during treatment, which makes it way easier to stick with the routine.
What we also loved was the mint-flavored gel. Some whitening products have that harsh, chemical taste that makes you dread using them. Auraglow’s gel is pleasant—not overpowering, just a subtle mint that keeps your mouth feeling fresh during treatment. The texture is thick enough to stay where you apply it without being goopy or messy.
Now for the honest part—because we promised you the real deal. A few of us did experience some sensitivity, particularly around days four through six of consecutive daily use. Nothing unbearable, but that zingy feeling when drinking cold water that sensitive-teeth people know all too well. We found that switching to every-other-day treatments solved this issue completely without really slowing down our results.
The kit is made in the USA and uses enamel-safe ingredients, which gives us peace of mind. Auraglow also offers a 60-day money-back guarantee, so there’s really no risk in trying it. When you break down the cost per treatment, you’re looking at just a few dollars per session—compare that to the $500-800 you’d spend at the dentist for similar results.
Who this kit is perfect for: If you’re dealing with stubborn stains from years of coffee, wine, or smoking and want professional-level results without the professional-level price tag, Auraglow delivers. It’s ideal for people who can commit to 30 minutes daily (or every other day) and want to see dramatic improvements within a week. Just be prepared to manage some potential sensitivity if you have naturally sensitive teeth.
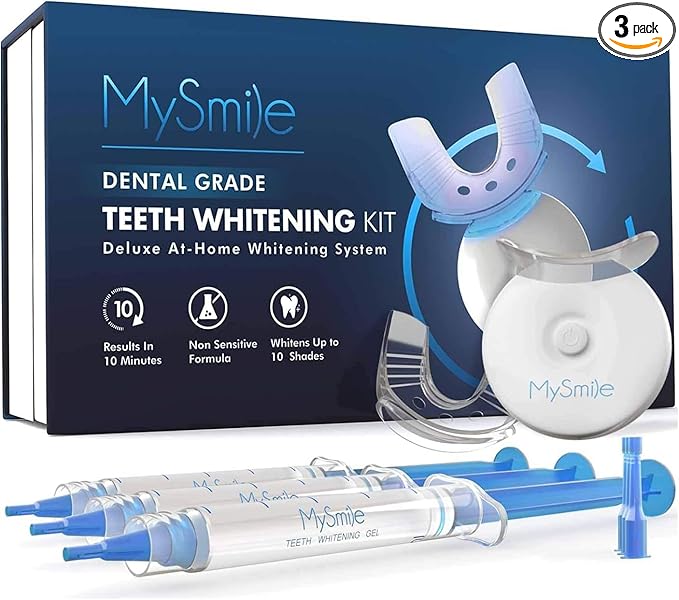
Let me tell you about Jake, one of our testers who’d tried whitening products three times before and quit every single time because of the tooth pain. He has naturally sensitive teeth and had basically resigned himself to never having a bright smile. The MySmile kit changed that completely.
MySmile took a different approach with their formula. Instead of going for maximum strength and speed, they engineered their carbamide peroxide gel to be gentler while still delivering real results. The kit uses advanced LED-activated technology—and here’s the game-changer—it only requires 10 minutes per session. Not 30 minutes, not an hour. Just 10 minutes.
Think about how manageable that is. Jake used it during his lunch break at work. Another tester, Michelle, did it while waiting for her morning coffee to brew. The wireless LED light made it incredibly convenient—you’re not stuck standing near an outlet or sitting in one spot. You can walk around, check your emails, scroll social media, whatever you need to do.
The sensitivity factor was what really blew us away. Jake completed the full two-week treatment cycle without experiencing the tooth pain that had derailed his previous attempts. He reported that maybe one day, when he felt a tiny bit of sensitivity, but nothing that made him want to stop using it. For someone who’d abandoned whitening three times before, that’s huge.
Results-wise, MySmile delivered noticeable improvements starting around day four. The changes were more gradual than with Auraglow—instead of a dramatic overnight transformation, it was a steady, consistent lighting. By the end of two weeks of daily use, our testers achieved whitening of five to seven shades, which is genuinely impressive for a product that causes virtually zero sensitivity.
The LED light itself has a built-in timer that automatically shuts off after 10 minutes, so you never have to worry about over-treating. It’s also IPX7 waterproof, which means you can literally use it in the shower if you want (though we found that a bit unnecessary—just a cool feature to have).
The gel formula is vegan, gluten-free, and sugar-free, which our team members with dietary restrictions really appreciated. It has a mild, pleasant taste—not medicinal or harsh like some whitening products. The kit comes with multiple gel syringes, giving you enough for several weeks of consistent treatment.
One thing we particularly liked was how the MySmile tray fit. It’s designed to mold comfortably to your teeth without that bulky, uncomfortable feeling that makes some people gag. Several of our testers commented that they barely noticed they were wearing it after the first few uses.
The warranty on the LED light (three months) also gave us confidence in the product quality. MySmile clearly stands behind what they’re selling, which matters when you’re investing in oral care products.
Who this kit is perfect for: If you’ve tried whitening before and quit because of tooth sensitivity, or if you know you have sensitive teeth and have been avoiding whitening treatments altogether, MySmile is your answer. It’s also ideal for busy people who can’t commit to long treatment sessions—10 minutes fits into literally anyone’s schedule. The trade-off is slightly slower results, but the comfort factor makes it absolutely worth it. This kit proves you don’t have to suffer for a brighter smile.
The iSmile kit became our team’s favorite for one specific reason: it gives you everything you need for comprehensive whitening and post-whitening care in one affordable package. While the other kits focus purely on whitening, iSmile thought ahead about what happens after you achieve your desired shade—how do you maintain it and protect your enamel?
The kit includes a 5X LED light-activated system with powerful blue LED technology that accelerates the whitening process, three 3ml syringes of 35% carbamide peroxide gel in a pleasant mint flavor, and here’s the standout feature—a remineralization gel. That remineralization gel is something we didn’t even know we needed until we used it, but it makes a significant difference in strengthening enamel and reducing sensitivity after whitening treatments.
During our testing, Maria used the iSmile kit and followed their recommended protocol: whiten for 15-20 minutes with the LED light, then apply the remineralization gel afterward. She found that the post-treatment gel not only minimized any sensitivity but actually made her teeth feel stronger and smoother. That remineralization step isn’t just marketing hype—it genuinely helps restore minerals to your enamel that can be temporarily depleted during whitening.
The LED light features five powerful bulbs designed to penetrate deeper and activate the whitening gel more effectively than standard single-bulb systems. The built-in 10-minute timer takes the guesswork out of treatment duration. The light is hands-free and lightweight, so you can go about light activities while whitening—we’re talking folding laundry, checking emails, or watching TV.
The comfort mouth tray that comes with iSmile deserves praise. It’s moldable, so you heat it in warm water and then bite down to create a custom fit for your unique tooth shape. Once molded, it stays comfortable throughout treatment without slipping around or feeling bulky. Several team members mentioned they barely noticed wearing it after the first few sessions.
Results from the iSmile kit were impressive and comparable to Auraglow. Our testers saw initial improvements within three to four days and achieved significant whitening (six to nine shades) within two weeks of consistent use. The 35% carbamide peroxide formula effectively removed stains from coffee, wine, smoking, and food without causing the extreme sensitivity some stronger products can trigger.
One aspect that stood out during testing was the quality of the gel itself. The mint flavor is refreshing without being overpowering, and the consistency is perfect—thick enough to stay on your teeth but not so goopy that it feels uncomfortable. The syringes make application super easy and precise, so you’re not wasting product.
iSmile also backs their product with a 100% customer satisfaction guarantee, which gave us confidence in trying it. When we calculated the cost per treatment, iSmile came out as one of the most economical options that still delivers professional-quality results. You’re getting 22+ treatments in the kit, plus the remineralization gel for ongoing enamel care.
Who this kit is perfect for: iSmile is ideal for people who want comprehensive oral care, not just whitening. If you’re concerned about enamel health or have experienced sensitivity with other products, the included remineralization gel makes this kit stand out. It’s perfect for first-time whitening users who want a complete system that guides them through the entire process—whitening and aftercare. The value proposition is also excellent for budget-conscious buyers who don’t want to compromise on quality. Anyone who wants to maintain their whitening results long-term will appreciate the thoughtful extras included in this kit.
Types of Teeth Whitening Products: Finding Your Perfect Match
During our extensive testing, we tried virtually every type of whitening product available. Here’s what we learned about each category and who they work best for.
Whitening Kits with LED Lights
These are the heavy hitters of at-home whitening. They typically include custom or moldable trays, whitening gel, and an LED light that supposedly accelerates the whitening process. After testing multiple LED kits, we can confirm that the light does seem to make a difference, though results vary by product.
The advantage of these kits is comprehensive coverage and faster results. You’re looking at anywhere from 10 to 30 minutes per session, which requires some commitment but delivers noticeable improvements quickly. Based on our experience, expect to see results within three to five days of consistent use.
The downside? These kits require the most time investment, and if you have sensitive teeth, you might need to take breaks between treatments. They’re also the priciest option upfront, though when you calculate cost per treatment, they often end up being more economical than professional dental whitening.
Whitening Strips
Whitening strips remain one of the most popular at-home options, with professional-grade versions containing effective formulations that deliver gradual results. We tested several brands and found that strips work well for people who want a middle-ground option between convenience and effectiveness.
The strips we tested generally required 30 minutes of wear time daily for about two weeks. Results were noticeable but developed more gradually than with LED kits. We found strips ideal for people who want to multitask while whitening—you can wear them during your morning routine or while doing household chores.
One frustration our team encountered: strips don’t always stay put perfectly, especially if you’re talking or moving around a lot. Several team members also noted that strips don’t reach the very back teeth well, so whitening can look slightly uneven if you have a wide smile.
Whitening Pens
Whitening pens use peroxide-based gels in a convenient applicator format, making them perfect for targeted treatment and on-the-go touch-ups. Our experience confirmed that these work best as maintenance tools rather than primary whitening solutions.
The beauty of pens lies in their convenience and precision. Got one tooth that’s slightly darker than the others? A pen lets you target it specifically. Heading to an event and want a quick brightness boost? A pen travels easily in your purse or pocket.
However, let’s be real—pens alone won’t give you dramatic results if you’re starting with heavily stained teeth. We recommend using them either for maintenance after achieving your desired shade with a kit or for gradual, subtle improvements over time.
Whitening Toothpastes
These are the most accessible options, but also the least dramatic in terms of results. During our testing, whitening toothpastes helped maintain brightness and prevent new stains, but they didn’t actually change the underlying color of teeth.
Think of whitening toothpaste as the foundation of your whitening routine rather than the main event. They work by gently polishing away surface stains through mild abrasives and sometimes low concentrations of peroxide. We noticed the most benefit from using whitening toothpaste consistently alongside other whitening treatments.
How We Tested: Our Methodology
Transparency matters, so let’s walk you through exactly how we evaluated these products. Our assessment team consisted of eight people with varying degrees of tooth discoloration from different causes—coffee staining, smoking history, natural yellowing with age, and medication-related discoloration.
We photographed each tester’s teeth at the beginning using a professional camera setup with consistent lighting. Then we used a dental shade guide to measure the exact starting color. Each team member tested one primary product for the full recommended treatment period, tracking results weekly.
We documented sensitivity levels, ease of use, taste, comfort, messiness, and, of course, actual whitening results. Every product was purchased with our own funds, and we followed the manufacturer’s instructions precisely. After completing primary treatments, we cross-tested several products to verify our findings.
The entire testing process took three months, and we consulted with two dental professionals to ensure we were evaluating effectiveness and safety appropriately.
Understanding the Active Ingredients: What You're Actually Putting on Your Teeth
When you’re shopping for whitening products, you’ll see two main ingredients listed: hydrogen peroxide and carbamide peroxide. Understanding the difference helps you make smarter choices.
Hydrogen peroxide is the direct bleaching agent. It penetrates tooth enamel quickly and breaks apart the molecules, causing discoloration. Products with hydrogen peroxide typically deliver faster results but can sometimes cause more sensitivity. In our testing, concentrations between 6-10% worked best for at-home use.
Carbamide peroxide is actually a compound that breaks down into hydrogen peroxide plus urea when it contacts water. This slower release means gentler treatment with less sensitivity but slightly longer treatment times. Generally, 10% carbamide peroxide equals about 3.5% hydrogen peroxide in terms of whitening power.
We found that our team members with sensitive teeth did better with carbamide peroxide products, while those wanting the fastest results preferred hydrogen peroxide formulations.
Safety First: What You Need to Know Before Whitening
Whitening your teeth with peroxide-based products is generally safe when you follow instructions properly and avoid ingestion. LED whitening is also safe for teeth when used for the recommended duration according to product instructions.
However, our team learned some important safety lessons during testing. First, more is not better. Using whitening products too frequently or for longer than recommended doesn’t accelerate results—it just increases sensitivity and can damage enamel.
Second, if you have existing dental work, check with your dentist before whitening. Crowns, veneers, and fillings won’t whiten the same way natural teeth do, which could create color mismatches. One of our testers had a front crown and needed to coordinate with her dentist to ensure everything looked uniform.
Third, whitening isn’t recommended if you’re pregnant, breastfeeding, or under 16 years old. Your teeth need to be fully developed, and there’s not enough research on the effects during pregnancy.
We also learned that gum irritation can happen if gel contacts soft tissue. Being careful during application and using products with tray guards or precision applicators helps avoid this issue.
Managing Sensitivity: Real Tips That Actually Work
Let’s address the elephant in the room—tooth sensitivity is the number one complaint with whitening treatments, and our team definitely experienced it. Here’s what actually helped us manage it:
Take breaks: Instead of whitening daily for 14 days straight, try every other day. Our results were nearly identical but with significantly less sensitivity.
Use sensitive toothpaste: Start using it a week before you begin whitening. Brands containing potassium nitrate or stannous fluoride genuinely helped our team members.
Reduce treatment time: If a product recommends 30 minutes but you’re experiencing discomfort, try 15-20 minutes instead. You’ll get results more slowly but more comfortably.
Avoid extreme temperatures: During whitening treatments, our team found that very hot or cold foods and drinks intensified sensitivity. Room temperature is your friend.
Apply remineralization gel: Several team members found that applying a remineralization gel (like the one included in the iSmile kit) after whitening treatments prevented most sensitivity issues and strengthened enamel.
One team member discovered that her sensitivity was actually from overly vigorous brushing, not the whitening product. Once she switched to a softer toothbrush and gentler technique, the problem resolved.
Professional vs. At-Home Whitening: The Honest Comparison
Several of our team members had previously done professional whitening at the dentist, so we could compare directly. Here’s what we found:
Professional whitening uses much higher concentrations of hydrogen peroxide (sometimes up to 40%) under controlled conditions. Results are dramatic and immediate—you walk out after one appointment with noticeably whiter teeth. The average cost ranges from $300 to $1,000, depending on your location and method used.
At-home treatments use lower concentrations, so results develop over days or weeks rather than hours. However, the final results can be quite similar if you’re patient and consistent. Our top-pick kits cost between $30 and $80, making them significantly more budget-friendly.
The trade-off is time and convenience. Professional whitening gets you there fast but costs more. At-home products require dedication but save money. For our team, at-home whitening made more sense, especially since we could whiten while doing other activities.
One advantage of professional treatments: your dentist can address any underlying dental issues first and ensure whitening is appropriate for your specific situation. We recommend at least having a dental checkup before starting any whitening regimen.
Foods and Habits That Stain: What to Avoid During Treatment
We learned this lesson the hard way—continuing to consume heavily staining foods while whitening is like washing your car in a rainstorm. Here’s what sabotaged some of our team members’ results initially:
Coffee and tea are the obvious culprits, but we found that even a single cup daily noticeably slowed whitening progress. If you absolutely can’t give up your morning coffee (we get it), use a straw to minimize contact with your front teeth.
Red wine, dark sodas, and tomato-based sauces all caused visible staining during our test period. Berries, soy sauce, balsamic vinegar, and curry also made the list of foods that worked against our whitening efforts.
Smoking is perhaps the worst offender. The team member who smoked during testing saw significantly slower results compared to others, even when using the same products.
The good news? We found that rinsing with water immediately after consuming staining foods helped minimize damage. Eating staining foods during meals rather than sipping on them throughout the day also reduced their impact.
Maintaining Your Results: The Long Game
Getting your teeth white is one thing—keeping them that way is another. After our testing period ended, we continued tracking results to see how long improvements lasted. Here’s what worked for maintenance:
Use touch-up treatments quarterly: Every three months, we’d do a 3-5 day treatment with our whitening kit. This kept our teeth looking consistently bright.
Switch to a whitening toothpaste: Even though these don’t dramatically whiten teeth, they prevent new stains from setting. We noticed a real difference compared to regular toothpaste.
Apply remineralization gel regularly: If your kit includes it (like iSmile does), use it weekly even after whitening is complete to maintain enamel strength and prevent new staining.
Stay on top of dental cleanings: Professional cleanings remove surface stains that home care misses. Our dentists noticed our teeth looked brighter even before whitening treatments.
Watch what you drink: Several team members found that reducing coffee from three cups to one cup daily made a huge difference in maintaining whiteness.
Common Mistakes We Made (So You Don't Have To)
Through our testing, we made plenty of mistakes. Learn from our missteps:
Mistake #1: Not reading instructions thoroughly. One team member used twice the recommended gel amount, thinking more would work better. It just caused gum irritation and wasted product.
Mistake #2: Brushing immediately after whitening. Your enamel is slightly more porous right after treatment. Brushing immediately can cause sensitivity. We learned to wait at least 30 minutes.
Mistake #3: Expecting overnight miracles. Whitening is a gradual process. Setting realistic expectations prevented disappointment.
Mistake #4: Inconsistent application. The team member who whitened sporadically got far less impressive results than those who stuck to a schedule.
Mistake #5: Ignoring sensitivity warnings. One tester powered through significant sensitivity instead of taking a break. This prolonged the discomfort unnecessarily.
Mistake #6: Not checking expiration dates. Whitening products lose potency over time. That discount kit that’s been sitting in your bathroom for 18 months? Probably not very effective anymore.
Special Considerations: When to See a Dentist Instead
While at-home whitening worked great for our team, certain situations require professional attention. If your teeth are discolored due to medication (like tetracycline), injury, or internal staining, over-the-counter products likely won’t help much. These cases often need professional treatments like veneers or internal bleaching.
If you have significant tooth decay, gum disease, or extremely worn enamel, whitening products could cause damage. Get these issues addressed first.
We also recommend professional consultation if you’ve tried multiple at-home products without success. There might be underlying issues preventing whitening that a dentist can identify.
The Cost Breakdown: What You're Really Paying For
Let’s talk money because we’re all working with budgets. During our testing, we calculated the cost per treatment for each product category:
Professional whitening: $300-$1,000 for immediate results (one treatment)
At-home LED kits: $40-$80 for 20-45 treatments ($1-$4 per treatment)
Whitening strips: $25-$50 for 14-28 treatments ($0.90-$3.50 per treatment)
Whitening pens: $15-$40 for 40-50 treatments ($0.30-$1 per treatment)
Whitening toothpaste: $5-$12 per tube, lasting 2-3 months
From a pure cost perspective, whitening pens offer the best value per treatment for maintenance. For the best balance of cost and dramatic results, we found LED kits like Auraglow, MySmile, and iSmile provided the most value. When you factor in that iSmile includes remineralization gel for ongoing enamel care, the overall value proposition becomes even stronger.
One hidden cost to consider: sensitivity management products. Our team spent an extra $15-$25 on sensitivity toothpaste and desensitizing gels during testing—though if you choose a kit like iSmile that includes remineralization gel or MySmile that’s formulated for sensitive teeth, you might avoid these extra costs entirely.
Natural Whitening Methods: Do They Actually Work?
We’d be remiss not to address natural whitening methods since they’re everywhere on social media. Our team tested several popular DIY approaches to see if they held up:
Baking soda: This actually showed mild whitening effects through mechanical abrasion, but it’s also somewhat abrasive to enamel if used too frequently. We’d rate it as minimally effective and recommend limiting use.
Activated charcoal: Despite the dramatic black-to-white aesthetic of charcoal whitening videos, we saw virtually no whitening effect. Plus, the mess factor was significant.
Oil pulling: No whitening effects observed in our testing, though some team members reported fresher breath. Not harmful, just not effective for whitening.
Hydrogen peroxide rinses: Very diluted hydrogen peroxide rinses showed some effect, but not nearly as much as actual whitening products. The risk of damaging gums with improper dilution made us cautious about recommending this method.
Strawberries and citrus: These acids can temporarily whiten through enamel erosion, which is definitely not something you want. We’d advise against these methods entirely.
Apple cider vinegar: Similar to fruit acids, this can erode enamel. Short answer: don’t do it.
The bottom line on natural methods: save your time and enamel by sticking with proven whitening products. The science behind peroxide-based whitening is solid, and these products are tested for safety and effectiveness.
Frequently Asked Questions from Our Testing Experience
How white can I realistically get my teeth?
Based on our team’s results, most people can lighten their teeth by 5-10 shades with consistent at-home whitening. However, there’s a limit—teeth have a natural baseline color determined by your dentin, which is the layer beneath enamel. You can’t whiten beyond your natural potential, regardless of how many treatments you do.
How long do results last?
With maintenance, our team’s whitening lasted 6-12 months before we noticed significant darkening. Team members who gave up coffee completely maintained results longer than those who continued drinking it daily. Regular touch-ups with your kit every few months helped maintain brightness indefinitely.
Can I whiten if I have crowns or veneers?
Yes, you can use whitening products, but they won’t change the color of dental work—only natural teeth. This can create mismatched colors, so plan accordingly. The good news is that products like Auraglow work safely on dental work, even if they don’t change their color.
Why are my teeth looking patchy during whitening?
This is actually normal. Teeth often whiten unevenly at first before evening out. Our team noticed this too, and it resolved after a few more treatments. Don’t panic—keep going with your treatment plan.
Can I drink coffee during whitening?
Technically, yes, but it will slow your results significantly. If you must have coffee, drink it through a straw and rinse immediately afterward. Better yet, try to cut back or take a coffee break during your intensive whitening phase.
Is LED light actually necessary?
Based on our testing, yes—LED lights do accelerate the whitening process and help achieve better results in less time. All three of our top picks include LED technology because it genuinely makes a difference in effectiveness.
Our Final Verdict and Recommendations
After three months of testing, countless photos, and way too many conversations about tooth color, here’s our bottom line:
For most people seeking dramatic, fast results and who can handle potential mild sensitivity, the Auraglow LED whitening kit offers the best combination of effectiveness and professional-quality outcomes. The results genuinely impressed our team, delivering up to 10 shades of whitening in just seven days.
If you have sensitive teeth or have abandoned whitening attempts in the past due to discomfort, the MySmile kit is your game-changer. It proved that effective whitening doesn’t have to hurt, and the 10-minute treatment time makes it the most convenient option for busy schedules.
For the best overall value and most comprehensive care, the iSmile kit takes the crown. The inclusion of remineralization gel for enamel health and post-whitening care makes it stand out from the competition. It’s perfect for first-time whitening users who want guidance through the entire process and ongoing maintenance support.
Remember that whitening is a marathon, not a sprint. Consistency matters more than intensity, and taking care of your teeth between treatments makes a huge difference in maintaining results. All three of our top picks delivered on their promises—the right choice just depends on your specific needs, sensitivity level, and lifestyle.