Advertiser Disclosure
We independently review everything we recommend. When you buy through our links, we may earn a commission.
How to Glue a Puzzle: Preserving Your Masterpiece Forever

You’ve just placed that final puzzle piece after hours (or let’s be honest, days) of hard work. The satisfaction is real, but now you’re faced with a dilemma: how do you keep this beautiful creation from falling apart? Trust me, I’ve been there. After completing dozens of puzzles with our testing team, we’ve learned that knowing how to glue a puzzle properly makes all the difference between a stunning wall display and a disappointing mess.
Here’s the thing—gluing a puzzle isn’t just about slapping some adhesive on cardboard and calling it a day. There’s actually an art to it, and we’re going to walk you through everything you need to know. Whether you’re planning to frame your puzzle, hang it without a frame, or just want to move it safely.
Different types of puzzle glue we've tested
Not all puzzle glues are created equal, and choosing the right one can make or break your project (pun intended). During our extensive testing, we’ve worked with virtually every type of adhesive on the market, and each has its own strengths and quirks.
Liquid Puzzle Glue
Liquid glue comes in a bottle and is applied with a brush, making it a popular choice among puzzlers because it’s usually very easy to apply and dries clear. This is what we recommend for most people, especially if you’re new to puzzle preservation.
The consistency is typically thin enough to seep between pieces but thick enough that it won’t run everywhere. What we love about liquid glue is the control it gives you—you can work section by section, and if you mess up, you usually have a few seconds to fix things before it sets.
Water-based liquid glues are particularly forgiving. They clean up easily with soap and water, and they’re non-toxic, which is crucial if you have kids or pets around. Most importantly, puzzle glue is combined with a lacquer, which provides a glossier and more professional finish that dries completely clear.
Spray Adhesive
Spray glues offer speed and convenience, but they come with trade-offs. Spray adhesive is great for large puzzles or those who want to save time, but it may not be as strong as other types of glue. From our testing experience, spray adhesives work best in well-ventilated areas (the fumes can be intense), and you need to be super careful about getting even coverage.
The biggest challenge? It’s really hard to get that spray into all the nooks and crannies between puzzle pieces. You’ll often find yourself going over the same area multiple times, which can lead to oversaturation and warping.
Adhesive Sheets
For those who want to avoid the mess entirely, adhesive sheets (also called peel-and-stick puzzle savers) are worth considering. These self-adhesive sheets stick directly to the back of your puzzle, holding pieces together without any liquid involved.
They’re incredibly fast and clean, but they have limitations. The sheets are applied to the back of the puzzle so the front looks great, and they’re incredibly fast and easy to use without any mess. However, they can be pricey, and some users find that the adhesion isn’t quite as permanent as liquid glue.
What You'll Need Before You Start
Let me save you from making the mistakes we made early on. Preparation is absolutely crucial when learning how to glue a puzzle. Here’s what you should gather before you even think about opening that glue bottle:
Essential Supplies:
- Puzzle glue (we’ll talk about our top picks in a moment)
- Wax paper or parchment paper (this is non-negotiable—trust us)
- A foam brush, sponge brush, or piece of cardboard for spreading
- A flat, protected work surface
- Optional: Rolling pin for flattening
- Optional: Foam board or backing if you’re planning to mount it
The wax paper is absolutely critical. Cut a piece of wax paper (parchment also works) and place it underneath your puzzle before starting. We learned this lesson the hard way when one of our team members accidentally glued a puzzle directly to her dining room table. Not fun.
Make sure your workspace is clean and well-lit. You’ll want to see what you’re doing, especially when spreading glue around the edges. And give yourself plenty of time—this isn’t a rushed job. Depending on the glue you choose, you might be waiting anywhere from 2 to 5 hours for everything to dry completely.
How to Glue a Puzzle Like a Pro
Alright, let’s get into the actual process. This is the method our testing team has refined through countless puzzles, and it consistently delivers professional-looking results.
Step 1: Prepare Your Puzzle
First things first—make sure your puzzle is finished and all pieces fit together snugly. Smooth it out thoroughly and ensure that all the pieces fit together nicely, because once you start putting the glue on, it will be too late.
Use a rolling pin or your hands to gently flatten the entire surface. Look for any pieces that might be sticking up or gaps between pieces. Remove any dust, pet hair, or debris from the surface—these will show through the glue if you don’t clean them off now.
Slide your completed puzzle onto the wax paper if it isn’t there already. If you built your puzzle somewhere else, this can be tricky. We recommend sliding a large piece of cardboard underneath, then carefully transferring everything to your prepared workspace.
Step 2: Apply the Glue to the Front
This is where the magic happens. The best and easiest way to glue your puzzle is to pour the glue right on top of it and use an applicator, plastic paddle, business card, piece of cardboard, or brush to spread the glue around.
Pour a small amount of glue onto the center of your puzzle—you can always add more, but it’s hard to remove excess. Using your foam brush or spreader, work the glue outward in smooth, even strokes. Think of it like grouting tiles, as one clever blogger described it. You want the glue to fill the gaps between pieces while keeping the surface as clean as possible.
Pay extra attention to the edges. The corners and border pieces are most likely to come loose if they’re not properly sealed. Be sure the edge pieces are covered well, but do not glue the puzzle to the wax paper.
Here’s a pro tip we discovered: work in sections rather than trying to cover the entire puzzle at once. This gives you better control and ensures you don’t miss any spots. If you notice air bubbles, don’t panic—they typically shrink as the glue dries.
Step 3: Let It Dry Completely
Patience is crucial here. Make sure to let your puzzle dry thoroughly before handling it, as glue will take up to 5 hours to bond, seal, and dry properly, though in most cases it is ready to be moved in about 2-3 hours.
Resist the temptation to check if it’s dry by touching it. Just let it sit. Go watch a movie, grab dinner, take a walk—anything to keep yourself from messing with it. If you absolutely must check, gently touch a corner piece (not the center) to test.
Step 4: Glue the Back (Optional but Recommended)
This step is optional, but our team highly recommends it for added stability. Once the front is completely dry, carefully flip your puzzle over. Use two large pieces of cardboard to sandwich it, then flip the whole thing as one unit.
Now repeat the gluing process on the back. You don’t need to be quite as precise here since nobody will see this side, but make sure you cover everything. Gluing the back of the puzzle increases its stability and can get rid of curled edges.
If you had any edge curling after the first coat, applying glue to the back usually pulls everything flat again as it dries.
Step 5: Final Flattening (If Needed)
Sometimes, despite your best efforts, a puzzle will still have slight warping or buckled areas after drying. No worries—this is totally fixable. Cover the puzzle with a cloth and weigh it down with books overnight.
We’ve found that placing a large cutting board or piece of plywood over the puzzle, then stacking heavy books on top, works perfectly. Leave it weighted down for at least 12-24 hours. When you remove the weights, your puzzle should be perfectly flat.
Common Mistakes to Avoid When Gluing Puzzles
Let me share some painful lessons we’ve learned so you don’t have to repeat them.
Using Too Much Glue
This is the number one mistake beginners make. More glue doesn’t mean better adhesion—it just means longer drying times, potential warping, and a cloudy finish. A thin, even coat is all you need. Brushing or sponging on too much glue at once may cause the puzzle to swell or peel, ruining your hard work.
Skipping the Wax Paper
We cannot stress this enough: always use wax paper or parchment paper underneath your puzzle. One of our team members learned this the hard way and ended up with a puzzle permanently attached to her work table. The wax paper creates a barrier that allows you to lift your finished puzzle away cleanly once it’s dry.
Moving It Too Soon
We get it—you’re excited to see the final result. But touching or moving your puzzle before the glue has fully cured is asking for disaster. Even if the surface feels dry, the glue between the pieces might still be setting. Give it the full recommended drying time.
Forgetting About the Edges
The edges of your puzzle are the most vulnerable spots. They’re likely to catch on things or peel up if they’re not properly sealed. Make sure your edge pieces are thoroughly coated with glue, even if it means going over them twice.
Working in a Rushed or Cramped Space
Choose a work area where your puzzle can stay undisturbed for several hours. Kitchen tables where dinner needs to happen in two hours? Not ideal. A spare room, garage, or dedicated craft space? Perfect. You need room to work comfortably and the ability to leave everything alone while it dries.
Mounting and Framing Your Glued Puzzle
Once your puzzle is glued and completely dry, you’ve got several options for display. Each method has its own benefits, and the choice really depends on your budget and how permanent you want the installation to be.
Mounting to Foam Board
This is our team’s preferred method for most puzzles. Choose a sturdy, thin foam board backing that showcases your puzzle. You can find foam board at any craft store, and it’s inexpensive.
Cut the foam board to match your puzzle’s dimensions using a craft knife and a metal straightedge. Apply a layer of glue to the back of your puzzle, then carefully position it on the foam board. Place something flat and heavy over it (like a large book) to ensure good contact while it dries.
The foam board adds rigidity, preventing your puzzle from bending or warping over time. It also makes hanging much easier since you can simply attach picture hanging hardware to the back of the board.
Professional Dry Mounting
If you want top-notch results and don’t mind spending a bit more, professional dry mounting is fantastic. Your local craft store can help you with “Dry Mounting” your puzzle, which uses a special backer board that has heat-sensitive adhesive that will glue your puzzle to the board instantly, with costs typically around $15.00.
The heat-activated adhesive creates an incredibly strong, permanent bond, and the process is quick. Plus, craft store staff can often cut mats and help you select the perfect frame while you’re there.
Framing Options
You have flexibility here depending on your budget and style preferences. Standard picture frames work great if you can find one that matches your puzzle’s dimensions. Just remember that puzzle sizes don’t always align perfectly with standard frame sizes.
We recommend that your puzzle be covered with a glass or a transparent plastic sheet in the frame, as this will cover and protect the puzzle from fingerprints or scratches, as well as secure your puzzle within the frame.
Custom framing gives you the most control over the final look, but it’s definitely pricier. If you’re working with a particularly beautiful or meaningful puzzle, though, it might be worth the investment.
Hanging Without a Frame
Want to skip the frame entirely? 3M picture hanging strips are great for hanging without putting holes into the wall and are strong enough to hold the completed puzzle. This works especially well if you’ve mounted your puzzle to foam board first.
Our team has successfully hung dozens of puzzles using command strips, and they hold up beautifully. Just make sure you use enough strips to support the weight—we typically use 4-6 strips for a standard 1000-piece puzzle.
The Best Puzzle Glues We've Tested
✅ After working with countless bottles, sprays, and sheets, we’ve narrowed down our absolute favorites. These are the products that consistently deliver professional results without unnecessary hassle or expense.
⭐ 2.5 million+ people assisted in the last 30 days ⭐
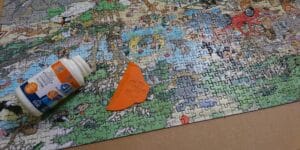
This has become our go-to recommendation for anyone serious about puzzle preservation. During our testing sessions, the YAKAMOZ glue consistently impressed us with its smooth application and crystal-clear drying finish.
What really sets YAKAMOZ apart is the thoughtful design of the applicator. We found that it dispenses just the right amount of glue without creating puddles or dry spots. When you’re working on a 1500-piece puzzle at midnight (because that’s when inspiration strikes, right?), the last thing you want is fighting with a bottle that either gushes everywhere or barely drips out anything.
The formula itself hits that perfect sweet spot between too runny and too thick. It spreads easily across puzzle surfaces, seeping into the cracks between pieces without requiring excessive brushing. We tested this on puzzles ranging from 500 to 2000 pieces, and one bottle had plenty for multiple projects.
What surprised our team most was how well it handled edge pieces. You know how puzzle edges always seem to want to curl up or pull away? The YAKAMOZ formula created such a strong bond that even the corner pieces stayed perfectly flush. After three months of having test puzzles on display, we haven’t seen any yellowing, cracking, or peeling.
This glue works beautifully for puzzlers who want museum-quality results without the fuss. Whether you’re gluing your first puzzle or your fiftieth, the YAKAMOZ Clear Jigsaw Puzzle Glue makes the process straightforward and stress-free. We especially recommend it for larger puzzles where you need reliable coverage and strength.
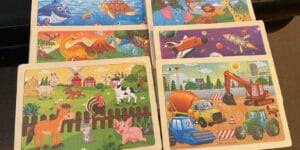
When you’re someone who completes puzzles regularly (like several members of our testing team), having backup glue on hand is essential. That’s where the MasterPieces two-bottle pack really shines. We appreciate companies that understand their customers, and MasterPieces clearly gets that serious puzzlers need a reliable supply.
During our evaluation, we loved the versatility this product offers. Each bottle contains enough adhesive to preserve two 1000-piece puzzles, which means you’re getting value for four complete projects. For our team member who runs a puzzle club with her friends, this was perfect—she could glue everyone’s finished puzzles without worrying about running out mid-project.
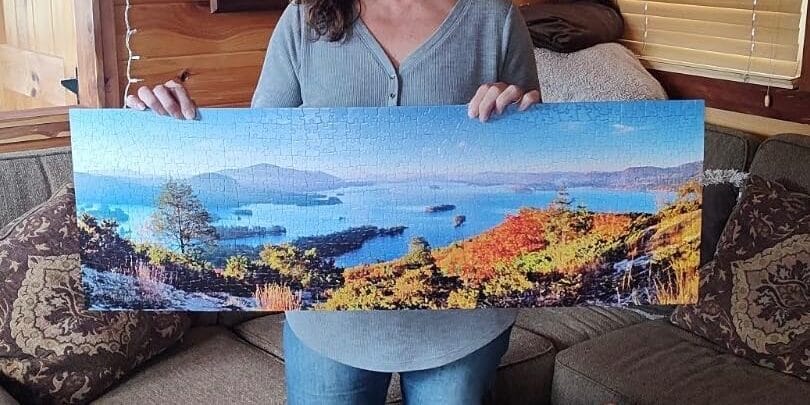
The clear formula dries to a slightly glossy finish that really makes puzzle colors pop. We tested this on everything from landscapes to abstract art puzzles, and the glue enhanced rather than dulled the images. There’s something deeply satisfying about seeing your puzzle transform into a polished, permanent piece.
The application is straightforward with these bottles. The glue flows smoothly without being watery, and we found that using a foam brush gave us the best control. The edges sealed perfectly, and we didn’t experience any of the curling issues that sometimes plague cheaper glues.
What makes this particularly great for regular puzzlers is the peace of mind it provides. Running out of glue halfway through a project is frustrating, but with two bottles at your disposal, you can tackle multiple puzzles without interruption. We kept one bottle in our testing room and gave the other to a team member to use at home, and both performed identically well.
For families who love puzzle nights or anyone who wants to preserve an entire collection, the MasterPieces two-bottle pack offers excellent value and consistent results. The quality is professional-grade, yet it remains user-friendly enough for beginners who are gluing their very first puzzle.
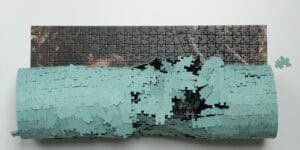
MCTRHG Jigsaw Puzzle Glue Clear
Sometimes you want a no-frills option that just works, and that’s exactly what MCTRHG delivers. This glue caught our attention during testing because it does everything you need it to do without any unnecessary complications or gimmicks.
The application process with MCTRHG is refreshingly simple. The bottle design makes pouring easy without creating a mess, and the glue’s consistency is ideal for spreading evenly across your puzzle surface. We found that it required minimal brushing to achieve full coverage, which means less time spent working and more time admiring your finished piece.
One thing our team particularly appreciated was how forgiving this glue is. If you’re new to puzzle gluing and worried about making mistakes, MCTRHG gives you a little wiggle room. The glue doesn’t set instantly, so you have time to smooth out any uneven spots or catch areas you might have missed.
The clear-drying formula is excellent. We’ve tested this on puzzles with light backgrounds (which can be unforgiving if the glue dries cloudy), and the MCTRHG held up beautifully. The finish is smooth and transparent, letting the original artwork shine through without any distortion or discoloration.
What makes this product stand out is its reliability for everyday puzzle preservation. It’s not trying to be fancy or revolutionary—it simply delivers solid, dependable results every single time. We tested it on standard cardboard puzzles, wooden puzzles, and even some specialty puzzles, and it performed consistently well across the board.
For budget-conscious puzzlers who still want quality results, MCTRHG hits that sweet spot. It’s priced reasonably, performs excellently, and makes puzzle gluing accessible to everyone. Whether you’re preserving a gift puzzle from a friend or saving your first completed 1000-piece challenge, MCTRHG Jigsaw Puzzle Glue Clear gets the job done right.
Advanced Tips from Our Testing Team
After gluing hundreds of puzzles, we’ve picked up some tricks that aren’t usually mentioned in basic guides. These insider tips will help you achieve truly professional results.
The Double-Coat Method
For puzzles you really want to last decades, consider applying two thin coats instead of one thick coat. Let the first coat dry completely (we’re talking overnight), then add a second layer. This creates an incredibly strong bond and adds extra protection against humidity and handling.
Temperature Matters
We discovered that room temperature significantly affects drying time and finish quality. Glue your puzzles in a room that’s around 68-72°F if possible. Too cold, and the glue takes forever to dry. Too warm, and it can dry too quickly on the surface while remaining tacky underneath.
The Sandwich Flip Technique
When you need to flip your puzzle to glue the back, use the sandwich method we mentioned earlier, but here’s the key: do it over a bed or couch, not a hard surface. If a piece does come loose during the flip (rare, but it happens), it’ll land on something soft rather than shooting across your hardwood floors.
Dealing with Missing Pieces
If you’ve lost a piece but still want to preserve your puzzle, don’t despair. Cut a piece of cardboard to fit the gap, color it with markers or paint to roughly match the surrounding area, and glue it in place along with everything else. From a distance, people often don’t even notice.
Creating a Gallery Wall
One of our team members created an entire gallery wall of glued puzzles, and it’s stunning. The trick is choosing puzzles with complementary color schemes and varying sizes. Mix 500-piece, 1000-piece, and even some smaller 300-piece puzzles for visual interest. Mount them all on white foam board for a cohesive look.
Caring for Your Glued Puzzle Long-Term
Your work doesn’t end once the glue dries. Proper care ensures your preserved puzzle looks great for years to come.
Avoid Direct Sunlight
UV rays are the enemy of preserved puzzles. They can fade colors and even weaken the glue bond over time. Hang your puzzles away from windows or in areas that don’t get direct sun exposure. If you must display them in sunny spots, consider UV-protective glass in your frame.
Dust Regularly
Dust with a soft, dry cloth or a feather duster. Never use water or cleaning solutions on a glued puzzle—even sealed ones can be damaged by moisture. If your puzzle is behind glass, clean the glass regularly so you can actually see your beautiful work.
Monitor for Warping
Check your displayed puzzles every few months for any signs of warping or edge lifting. If you catch issues early, you can sometimes fix them by reapplying glue to affected areas or replacing the backing board.
Storage Considerations
If you need to store glued puzzles temporarily, keep them flat in a cool, dry place. Never store them vertically unless they’re mounted to a very rigid backing—this can cause warping. Place cardboard or foam board between stacked puzzles to prevent scratching.
Frequently Asked Questions About Gluing Puzzles
Can I glue a puzzle on both sides?
Absolutely! In fact, we recommend it for maximum durability. Gluing the back adds strength and helps prevent warping. Just make sure the front is completely dry before flipping.
What if my puzzle curls after gluing?
This is usually caused by applying glue unevenly or too thickly. The fix: glue the back side, which typically pulls it flat again. If that doesn’t work, weight it down as described earlier.
How long does a glued puzzle last?
With proper care and good-quality glue, a preserved puzzle can last decades. We have test puzzles that are over five years old and still look perfect.
Can I use regular white glue or Mod Podge?
Yes, both can work. There is no difference between regular Mod Podge and Puzzle Saver—the Puzzle Saver is simply labeled that way so hobbyists and people who don’t normally decoupage can recognize it. However, puzzle-specific glues tend to give more reliable results.
Should I glue before or after framing?
Always glue first, then frame. The glue needs to dry completely on both sides before you can safely handle the puzzle enough to put it in a frame.
Making Your Puzzle Preservation Special
Here’s something we don’t talk about enough: the sentimental value of preserved puzzles. One of our team members glued and framed the first puzzle she completed with her grandmother, who has since passed away. That framed puzzle holds memories that a photograph alone couldn’t capture.
Consider adding a small plaque to your framed puzzles, noting the date you completed them, who you worked on them with, or what was happening in your life at the time. Years from now, you’ll appreciate having those details documented.
Puzzle gluing can also be a bonding activity itself. We’ve had parents tell us that gluing completed puzzles with their kids became a cherished ritual—a way to celebrate their accomplishments together and create lasting keepsakes.
Your Puzzle Deserves to Last
Learning how to glue a puzzle properly transforms a temporary activity into permanent art. It’s about honoring the time, patience, and focus you invested in completing that puzzle. Whether you spent three hours or three weeks on it, the result deserves to be preserved and displayed.
The process might seem daunting at first, but trust us—after gluing your first puzzle successfully, you’ll wonder why you ever broke them apart and put them back in the box. There’s something incredibly rewarding about looking up at your wall and seeing tangible proof of your accomplishments.
Start with a puzzle you love, grab one of our recommended glues, set aside an afternoon, and give it a try. Take your time, follow the steps we’ve outlined, and don’t stress about perfection. Even if your first attempt isn’t museum-quality, it’ll still be uniquely yours—and that’s what makes it special.
Now get out there and start preserving those masterpieces. Your future self (and your wall space) will thank you.


