Advertiser Disclosure
We independently review everything we recommend. When you buy through our links, we may earn a commission.
How to Clean Grimy Old Lego Bricks
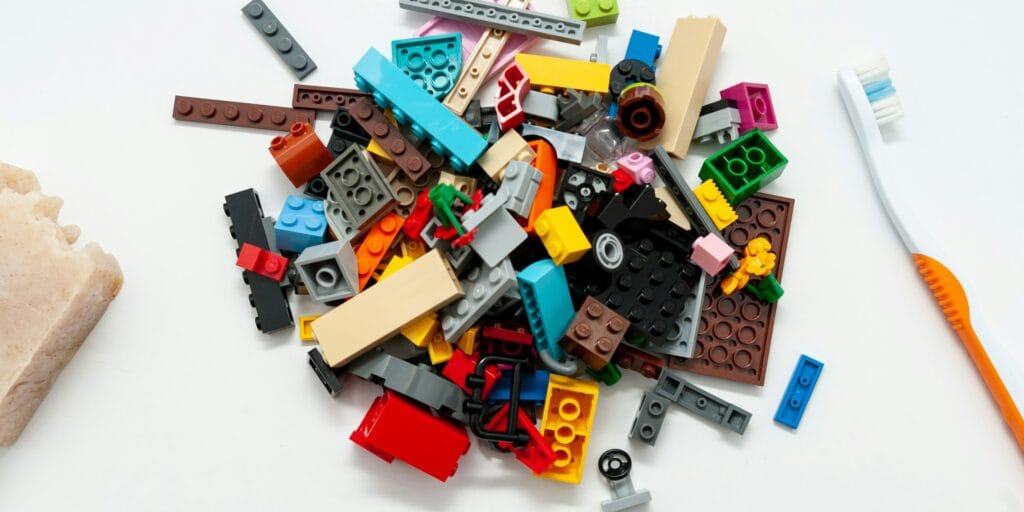
Before diving into cleaning methods, it’s important to understand that LEGO bricks are made from ABS plastic (Acrylonitrile Butadiene Styrene), a durable material that nevertheless has specific vulnerabilities. Temperature extremes can warp pieces, harsh chemicals can dull surfaces or damage prints, and improper cleaning techniques can scratch the plastic or loosen stickers.
The official guidance from LEGO itself is straightforward: clean pieces by hand using water no hotter than 104°F (40°C) and a soft cloth or sponge, with mild detergent if needed. However, real-world scenarios often demand more nuanced approaches, which is where our testing comes in.
The Gold Standard: Hand Washing Method
Hand washing remains the safest and most controlled method for cleaning LEGO bricks. Through our extensive testing, we’ve refined this process into a reliable system that works for everything from individual pieces to small collections.
What You’ll Need
- Large plastic bins or buckets (at least two)
- Lukewarm water (no hotter than 104°F/40°C)
- Mild dish soap (never use bleach)
- Soft cloths or sponges
- Soft-bristled toothbrush
- Clean towels for drying
- Optional: Brick separator for disassembling
Step-by-Step Process
1. Pre-Sort Your Pieces
Before any water touches your bricks, separate these items that require special handling:
- Electronic components (motors, lights, battery boxes, sensors)
- Pieces with stickers or decals
- Chrome or metallic finishes
- Printed elements you’re concerned about
- Rubber tires and flexible elements
2. Prepare Your Wash Station
Fill your first bin with lukewarm water and add just a few drops of mild dish soap. The water should feel comfortable on your hands—if it’s too hot for you, it’s too hot for LEGO. We’ve found that over-soaping creates unnecessary rinsing work, so less is more here.
3. The Washing Process
Submerge batches of bricks and let them soak for 15-20 minutes. This loosens dirt and grime without requiring aggressive scrubbing. For stubborn areas—hollow studs, Technic pin holes, grilles, and textured surfaces—use your soft-bristled toothbrush with gentle circular motions.
4. Thorough Rinsing
Transfer cleaned bricks to your second bin filled with clean water, or rinse under a gentle tap. This step is crucial—soap residue can leave your bricks feeling sticky and may attract more dust. Replace rinse water as needed until no bubbles remain.
5. Proper Drying
Spread pieces on clean towels in a single layer. Position them on their sides when possible to prevent water from pooling inside hollow elements. A fan (not a hairdryer) can accelerate drying. Expect 24-48 hours for complete drying, especially for pieces with complex internal geometry.
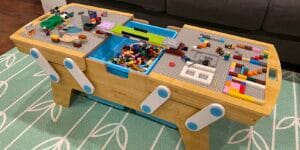
Bulk Cleaning: When You Have Hundreds of Pieces
For large collections, hand washing every piece individually becomes impractical. We’ve tested several bulk methods, each with distinct advantages and risks.
The Mesh Bag Method
This technique bridges the gap between hand washing and machine methods, offering speed without excessive risk.
Purchase quality mesh laundry bags—the dollar-store versions deteriorate quickly and may fail mid-wash. Our team recommends bags specifically designed for delicates with tight weaves that contain even the smallest LEGO pieces.
Process:
- Remove all electronics, stickered pieces, long, thin elements (antennas, hoses, axles), rubber tires, and chrome parts
- Load 500-800 grams of bricks per bag—overfilling reduces cleaning effectiveness
- Seal bags securely (double or triple tie if needed)
- Fill a bathtub or large sink with lukewarm water and mild soap
- Submerge bags and agitate periodically for 15-20 minutes
- Drain, rinse thoroughly with clean water
- Remove from bags and spread on towels to dry
The Controversial Washing Machine Approach
LEGO officially advises against this method, yet many bulk sellers and collectors use it successfully. After years of testing, we understand both why it works and why caution is warranted.
Why We’re Cautious:
- Heat from hot cycles can warp bricks
- Pieces can escape even quality mesh bags
- Mechanical action may scratch surfaces or damage fragile elements
- Stickers will almost certainly peel off
- Lost pieces in your machine’s drain can cause expensive repairs
If You Choose to Proceed:
- Use only cold water on the gentlest cycle
- Triple-bag pieces in high-quality mesh bags
- Remove all electronics, stickers, prints, rubber, and long, thin pieces
- Accept that you’re taking a calculated risk
- Consider this only for common bulk pieces, never rare or irreplaceable bricks
Based on our findings, we recommend the bathtub mesh bag method instead—it provides similar convenience with significantly lower risk.
The Dishwasher Question
Like washing machines, dishwashers are not officially recommended. Our testing revealed that while some LEGO sellers use dishwashers for baseplates and larger elements, several factors make this risky:
- Modern dishwashers often exceed the 104°F safety threshold during sanitize cycles
- Water jets can dislodge pieces from mesh bags
- Heated drying cycles may warp plastic
- Detergents designed for dishes may be too harsh for plastic
If you experiment with this method against our recommendation, use only the top rack, coldest cycle, no heated drying, and accept full responsibility for any damage.
Cleaning Without Disassembly: Dust and Display Maintenance
Not every cleaning task requires dismantling your carefully built sets. For display pieces and assembled models, we’ve developed effective maintenance routines that preserve your hard work.
Regular Dusting Techniques
Soft-Bristle Brushes: Small makeup brushes or artist’s paintbrushes work excellently for gentle dust removal. Work systematically across surfaces, using light strokes to avoid dislodging pieces.
Compressed Air: Canned air (or better yet, a rechargeable electric duster) quickly removes dust from crevices and hard-to-reach areas. Hold cans upright to prevent liquid propellant from contacting bricks. Use short bursts rather than continuous spraying, and be prepared for loose pieces to pop off occasionally.
Microfiber Cloths: For smooth surfaces and larger elements, slightly dampened microfiber cloths gently lift dust without scratching. Never use Swiffer-style dusters—their fibers catch on brick seams and create more problems than they solve.
Deep Cleaning Built Models
When display pieces need more than dusting, but disassembly isn’t an option:
- Use a soft brush to remove loose dust first
- Lightly dampen a microfiber cloth with lukewarm water (add one drop of mild soap if needed)
- Gently wipe surfaces, re-dampening and rinsing the cloth frequently
- Follow with a clean, dry cloth
- Allow 24 hours in a well-ventilated area for complete drying
This method works well for moderate dust and light grime but won’t address deep-seated dirt or sticky residue—for those situations, partial or full disassembly becomes necessary.
Special Cases and Problem-Solving
Electronic Components
Never submerge any electronic LEGO elements. For Powered Up systems, motors, battery boxes, light bricks, and sensors, use only a barely damp cloth with a drop of mild, unscented soap. Wipe gently, then immediately follow with a clean, dry cloth. Ensure complete drying before reconnecting or testing.
Stickered and Printed Elements
Stickers deserve extra caution—prolonged water exposure causes them to lift and peel. For stickered pieces:
- Wipe with a barely damp cloth only
- Dry immediately
- Never soak or scrub
- Consider hand-separating these from bulk washes entirely
Printed elements are more durable but not indestructible. While modern pad printing generally withstands normal washing, vintage prints from the 1970s-80s can be fragile. When in doubt, hand wash individually with minimal agitation.
Chrome and Metallic Finishes
Chrome pieces require gentle handling—they scratch more easily than standard ABS plastic. Hand wash only, using minimal soap and a soft cloth. Never use abrasive materials or harsh scrubbing motions.
Rubber and Flexible Elements
Tires, belts, tubes, and other rubber components should be separated from bulk washes. High heat accelerates rubber degradation, and prolonged soaking can affect its flexibility. Hand wash these separately in cool water.
Restoring Yellowed LEGO Bricks
One of the most common issues with vintage LEGO is yellowing, particularly on white, light gray, and light blue pieces. This isn’t dirt—it’s a chemical change in the plastic itself caused by UV exposure over time.
The Hydrogen Peroxide Method
This restoration technique has been thoroughly documented by the LEGO community, with roots in the “Retr0bright” method developed for restoring vintage computer equipment.
Materials Needed:
- 3% hydrogen peroxide solution (standard drugstore concentration)
- Clear plastic or glass container
- Direct sunlight or a UV lamp
- Safety glasses and rubber gloves
- Optional: Small amount of OxiClean or similar oxygen booster
Process:
- Clean bricks normally first to remove surface dirt
- Wearing gloves and safety glasses, fill your container with enough 3% hydrogen peroxide to fully submerge the pieces
- Add bricks, ensuring all remain submerged (weigh down floating pieces if needed)
- Place in direct sunlight or under a UV lamp
- Monitor progress over 2-8 hours, periodically wiping away bubbles that form
- Remove and rinse thoroughly when the desired whiteness is achieved
- Dry completely before use
Important Warnings:
- Test on common pieces before treating rare or valuable bricks
- Yellowing may return over time, especially with continued UV exposure
- Avoid treating pieces with prints or decals—hydrogen peroxide may affect them
- Work in a well-ventilated area
- Keep away from children
- The process isn’t permanent, and some collectors report yellowing returning within months to years
- Results vary by plastic age, color, and degree of degradation
According to LEGO community experts, this method works best on white and light gray pieces, with mixed results on other colors. We’ve found that managing expectations is important—restoration rarely achieves perfect, like-new color, but it can significantly improve appearance.
Alternative Mild Restoration
For less severe discoloration, simply cleaning with warm soapy water and a soft brush can remove surface yellowing caused by dirt rather than UV damage. Some collectors report success with brief controlled sun exposure after cleaning, though this remains controversial given that the sun causes the yellowing in the first place.
What NOT to Do: Common Mistakes to Avoid
Through our testing and community feedback, we’ve identified several methods that damage LEGO bricks:
Never Use:
- Bleach—it damages plastic and fades colors
- Water hotter than 104°F (40°C)—it can warp pieces
- Harsh chemical cleaners or solvents
- Abrasive scrubbers or scouring pads
- High-heat drying (ovens, microwaves, hairdryers)
- Prolonged direct sunlight for drying
- Ultrasonic cleaners at high power (though some report success at low settings)
- Steam cleaners—the high temperature risks warping
According to official LEGO guidance, pieces should never be placed in washing machines, dishwashers, ovens, microwaves, or dried with hairdryers, nor should they be left in direct sunlight to dry.