Advertiser Disclosure
We independently review everything we recommend. When you buy through our links, we may earn a commission.
How to Frame a Jigsaw Puzzle
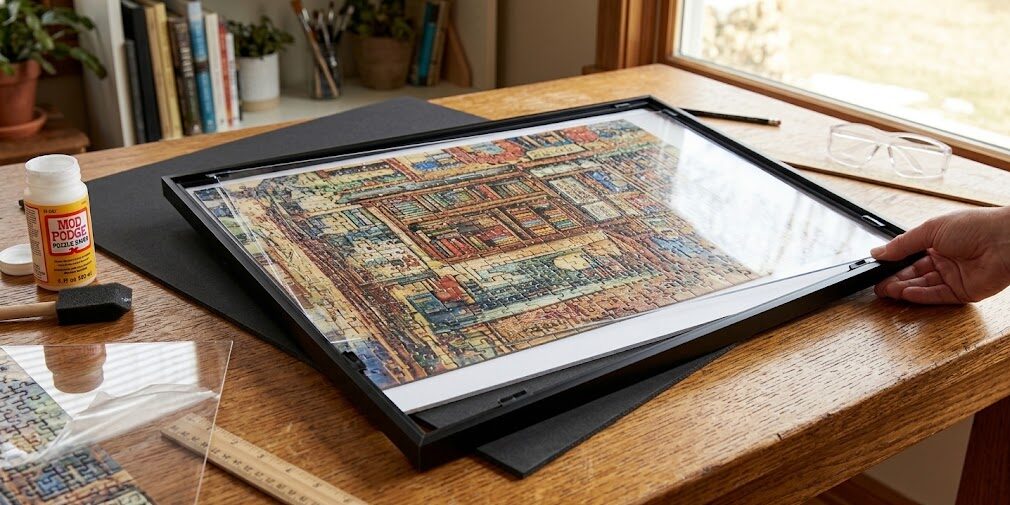
Gather everything first. Stopping mid-glue to hunt for a foam brush is how puzzles end up crooked.
- Puzzle glue. Our pick is Mod Podge Puzzle Saver. It brushes on, dries clear, and stays slightly flexible, which keeps the puzzle from cracking when you handle it. Its biggest rival, Ravensburger’s Puzzle Conserver, works too, but the brush-on style gives you more control on uneven edges.
- A wide foam brush or old credit card for spreading glue.
- Backing board. Foam core board is the winner here. It’s light, rigid, and cheap.
- A frame sized to your puzzle. More on that below.
- Wax paper or parchment to protect your work surface.
- A ruler and a pencil.

Specific Steps
Step 1: Check That Every Piece Is There
This sounds obvious, but gluing in a puzzle with a missing piece is a heartbreak you can’t undo. Run your hand across the whole surface. Look for gaps, raised edges, or pieces that sit a little low. Press everything flat before you go any further.
Step 2: Slide the Puzzle onto a Backing Board
Don’t try to lift a finished puzzle. Instead, slide a sheet of parchment or a thin cutting board underneath, then move the whole thing onto your foam core. If you built it on a puzzle mat, roll the mat carefully and slide the puzzle off onto the board.
Want to save yourself the stress? Build future puzzles on a board you plan to keep. Fair warning, though: pieces shift when you’re nudging them around, so patience wins here.
Step 3: Apply the Glue (The Part Everyone Fears)
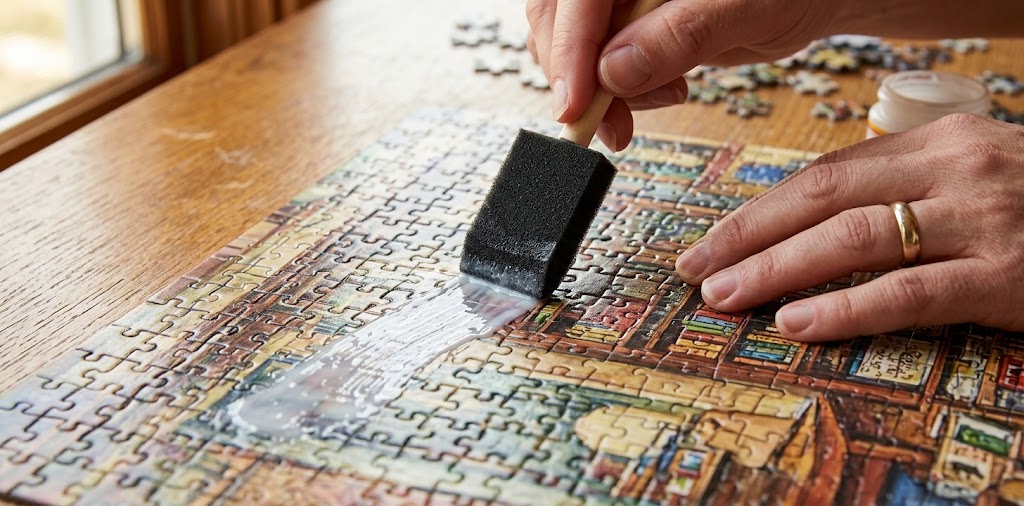
Here’s the truth: gluing is easier than it looks. Pour a thin line of glue across the top third of the puzzle, then spread it with your foam brush in long, even strokes. Work from the center out to the edges.
Two rules matter more than anything else:
- Go thin. A thick coat warps the cardboard and leaves a shiny, bumpy finish.
- Get the seams. The glue is doing its real work in the cracks between pieces. Brush back and forth across every line.
Let the first coat dry for roughly 15 to 30 minutes, then check the seams again.
Step 4: Flip It and Glue the Back
Many people skip this, and they regret it a few months later when the corners start to curl. Once the front is fully dry (give it a couple of hours to be safe), flip the puzzle onto wax paper and repeat on the back. This locks every piece into place from both sides.
Step 5: Choose the Right Frame
This is where most people overspend, so let’s be direct about it.
What size is the frame? A standard 1000-piece puzzle usually measures somewhere around 20 x 27 inches, though brands vary by an inch or two. A 500-piece puzzle is typically closer to 18 x 24 inches. Always measure your actual puzzle, not the box, since the cut sizes aren’t identical.
Glass or acrylic? Go with acrylic, especially above 1000 pieces. Glass looks lovely but gets heavy and breaks in transit. Acrylic is lighter, safer on walls, and far less stressful to hang.
Do you need a mat? Skip it unless you want a deliberate border. A mat covers the edge pieces, and those edge pieces are the part you finished first and probably love most.
Wood or metal? Pick whichever suits the room. Wood adds warmth to a puzzle with natural scenes. Black metal sharpens up bold, graphic designs.
Step 6: Place the Puzzle in the Frame
Wipe the acrylic with a microfiber cloth first. Then set the puzzle face-down on the glass, add your backing board, and press the frame’s clips or tabs into place. Check the front once before you seal everything. Dust stuck behind the glass is impossible to remove later.
Step 7: Hang It the Smart Way
Use two hooks instead of one for anything larger than 18 x 24 inches. Two points of support keep it level and stop the puzzle from sagging over time. Keep it out of direct sunlight, too. UV light fades the printed image faster than you’d expect.
Frequently Asked Questions About Framing a Jigsaw Puzzle
Can you frame a jigsaw puzzle without glue?
Technically, yes, but we don’t recommend it. Without glue, pieces can slip, rattle, or shift inside the frame. If you want a no-glue option, adhesive sheets work, but you’ll lose the seam-sealing effect that makes a glued puzzle feel solid.
How long does glue take to dry?
Plan on about 15 to 30 minutes per coat to set, then a couple of hours before you flip it. Give the whole job a full day before you frame it, just to be safe.
Will glue ruin the picture?
Not if you go thin. Cheap white craft glue can leave a cloudy film, which is exactly why a dedicated puzzle glue earns its spot on the shopping list.
Can you reuse a puzzle after gluing it?
No. Glued puzzles are permanent. If you think you’ll want to rebuild it someday, skip the glue and store it in the box instead.
Where can you learn more about puzzles?
Check out our guide to choosing the best jigsaw puzzles for adults if you’re hunting for your next build.
Common Mistakes That Ruin a Framed Puzzle
We see the same few errors again and again:
- Using too much glue. It buckles the cardboard.
- Skipping the back coat. Corners curl within months.
- Buying a frame before measuring. An inch off means a trip back to the store.
- Hanging it in a sunny window. Colors fade fast.
Avoid these four, and your puzzle will look professional for years.
Conclusion
Framing a jigsaw puzzle isn’t complicated. Glue it thin, seal both sides, choose an acrylic frame, and skip the mat. That’s the whole recipe, and it works every time.
So don’t let your hard work disappear into a closet. Grab a foam brush this weekend, finish what you started, and give that puzzle the wall space it earned. Already framed one? Tell us how it turned out, and while you wait for your next build, browse our favorite puzzle accessories.